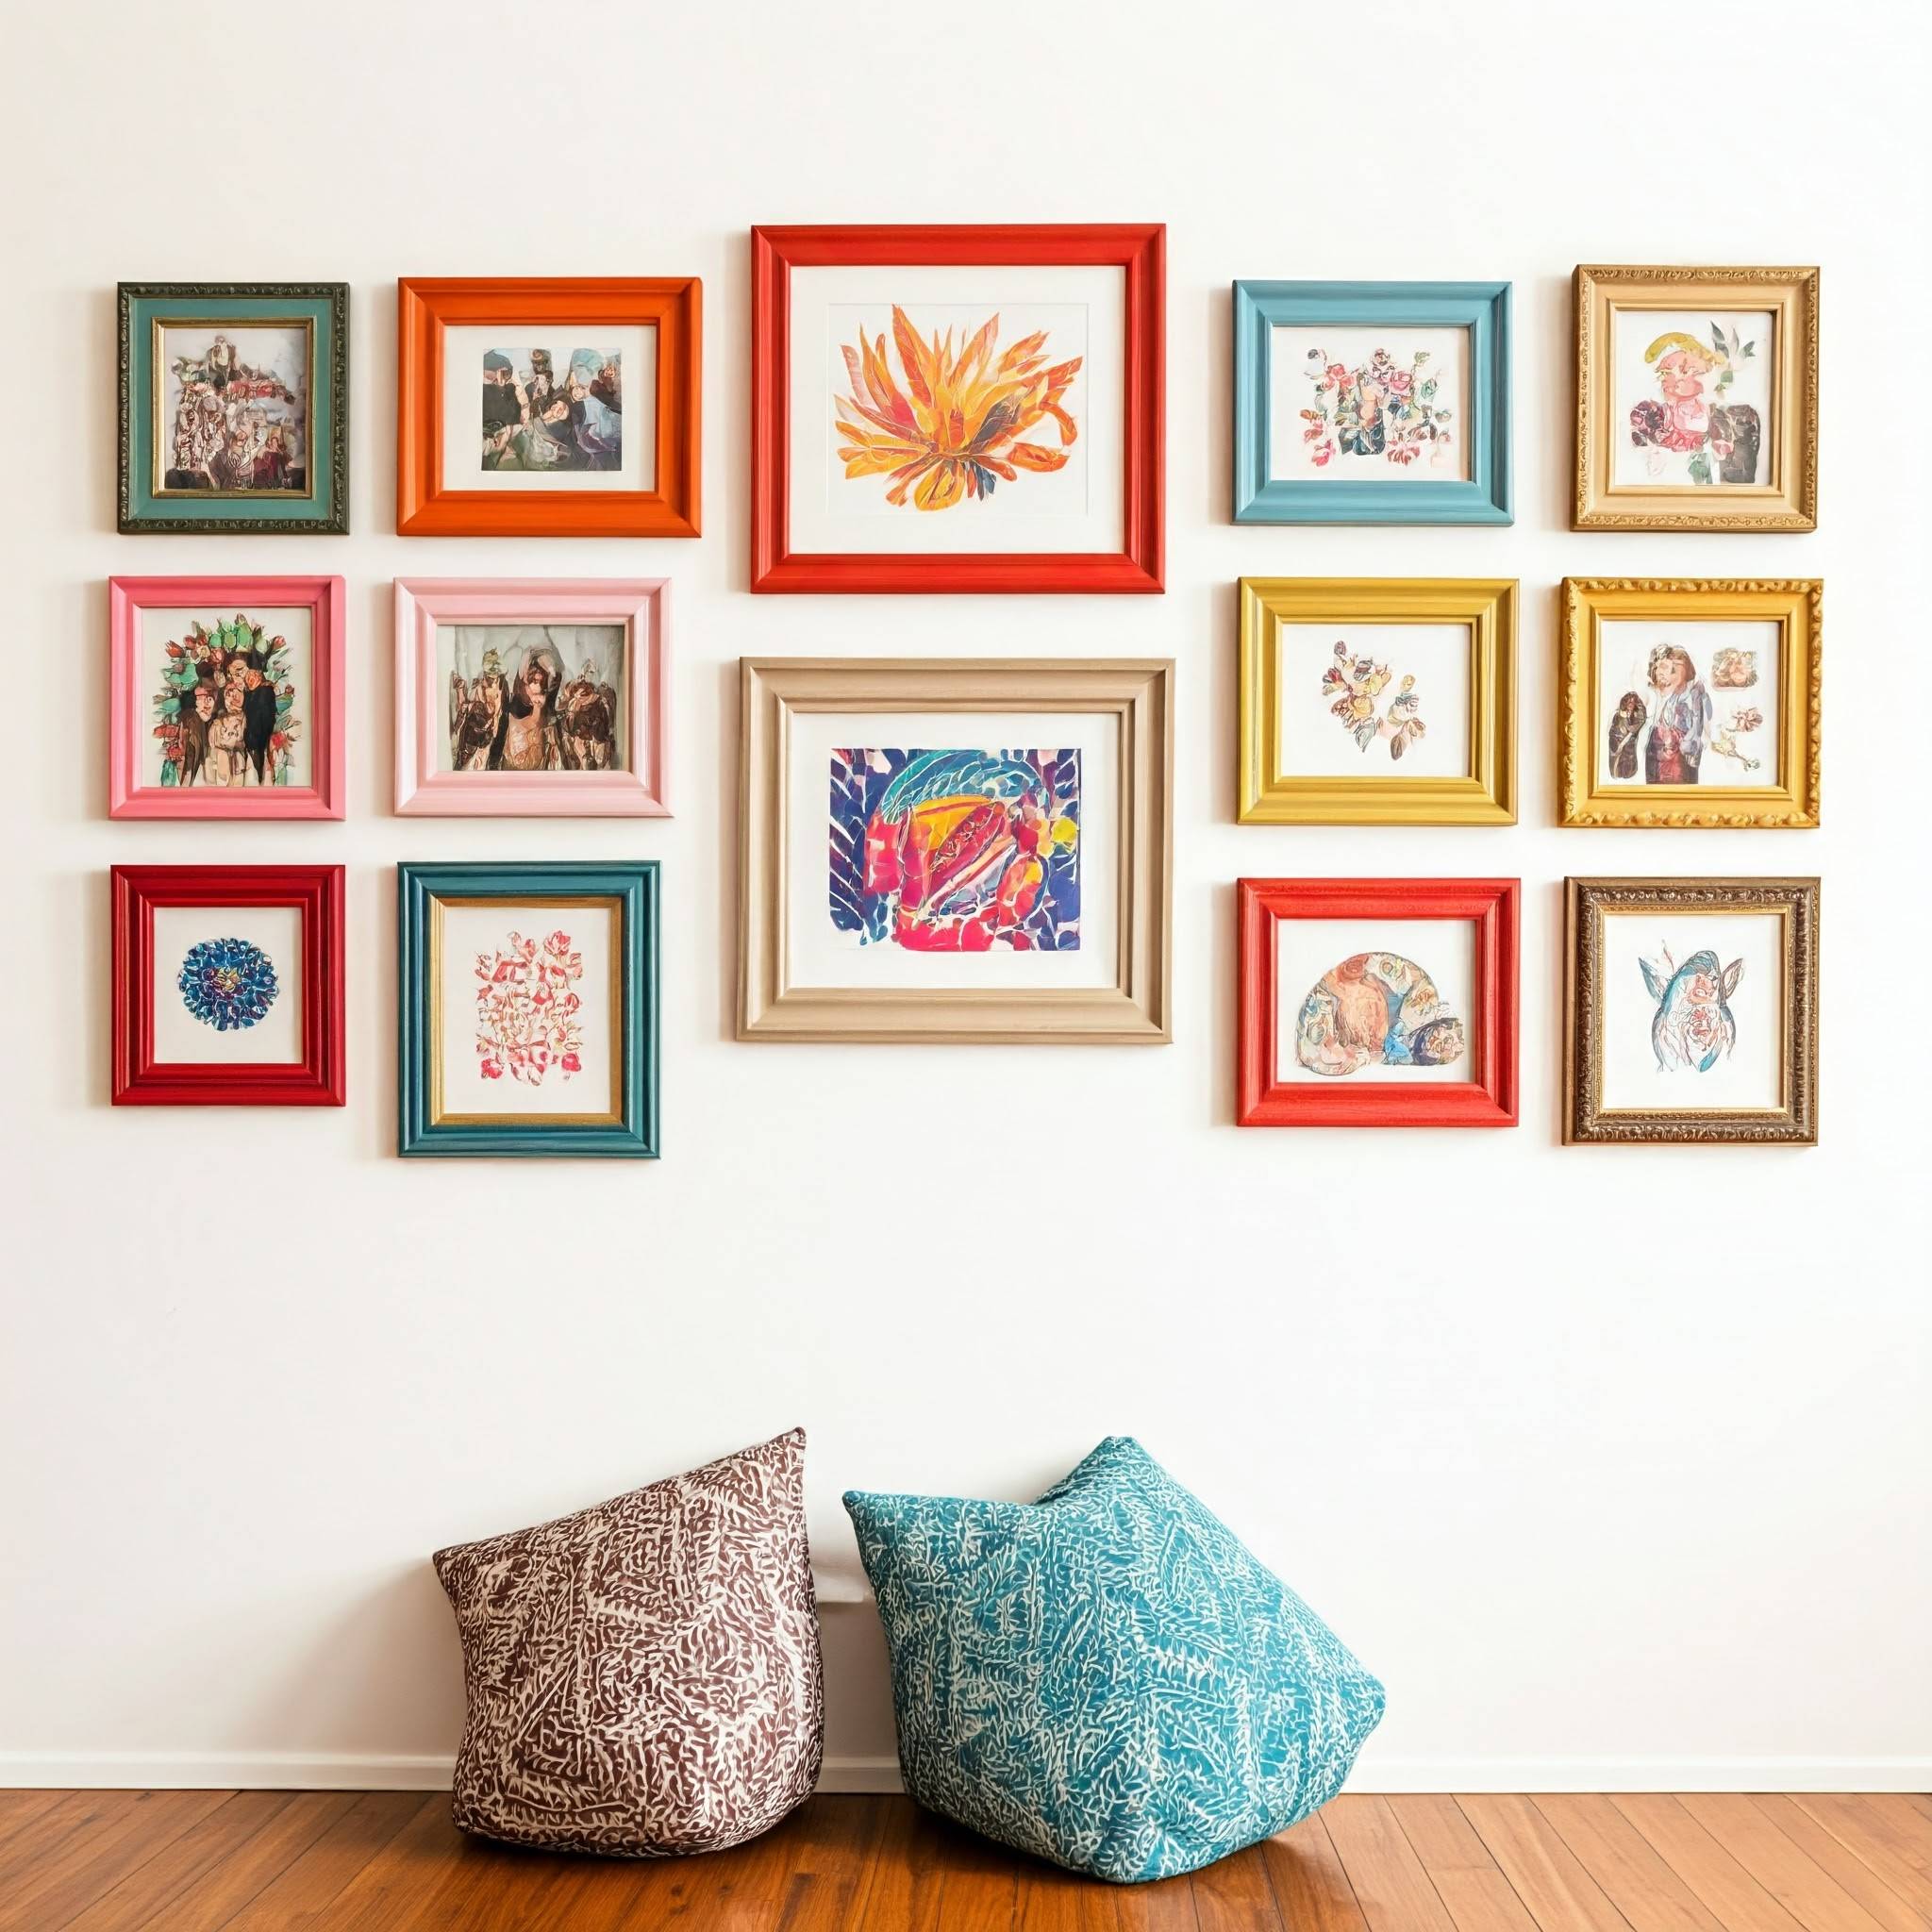
Creating a gallery wall is one of the most affordable and effective ways to transform a blank wall into an eye-catching feature. You don’t need to spend a fortune on expensive frames to achieve this look. Thrift store frames are a budget-friendly option that can add character and charm to your space. Here’s a step-by-step guide on how to create a stunning gallery wall using thrift store frames.
1. Choose the Frames
When visiting a thrift store, look for frames of various shapes and sizes. Don’t worry if they don’t match in color or style at first—what matters is the overall design you want to achieve. You can later paint them in one cohesive color or mix and match for an eclectic look. Focus on frames with interesting details, such as ornate designs or vintage styles, as they can bring a unique touch to your gallery wall.
2. Decide on the Layout
Before hanging the frames, decide how you want to arrange them on the wall. Lay them out on the floor and experiment with different layouts. You can opt for a symmetrical grid, which gives a clean, organized look, or an asymmetrical arrangement for a more artistic and relaxed vibe. Use painter’s tape to outline the layout on your wall so you know exactly where to place each frame.
3. Prep the Frames
Once you’ve chosen your frames, it’s time to prep them. If the frames are old or mismatched, you may want to sand them down and give them a fresh coat of paint. For a modern, unified look, spray paint them all the same color—black, white, or gold work well. If you’re going for a vintage or boho feel, you can leave the frames as they are, embracing the variety of styles and colors.
4. Select the Artwork or Photos
The next step is filling your frames with art, photos, or meaningful items. You don’t need to buy expensive artwork; print out high-quality images online, frame meaningful photos, or even create your own art. You can also frame personal items like postcards, dried flowers, or fabric swatches. Make sure the content in the frames complements the overall theme of your room. For example, black-and-white photos or abstract art work well in minimalist spaces, while colorful artwork can add vibrancy to a boho-themed room.
5. Hang the Frames
Start by hanging the center frame first and then work your way out. Use a level to ensure the frames are straight, and measure the distance between each frame to maintain consistency. If you're worried about making mistakes, you can cut out paper templates of your frames and tape them to the wall first to see how everything will look before committing to nailing into the wall.
6. Add Finishing Touches
Once your gallery wall is up, step back and take a look. You can always make adjustments by adding more frames or swapping out the artwork. Add complementary decor pieces like a small shelf with decorative items or a plant beneath the gallery wall to complete the look. The key is to keep the wall balanced and aligned with the overall style of your room.
Conclusion
Creating a gallery wall using thrift store frames is an easy, cost-effective way to personalize your home decor. By choosing unique frames, arranging them thoughtfully, and filling them with meaningful content, you can transform a plain wall into a creative statement piece. It’s not just about decorating your space—it’s about making it feel like home, filled with memories and art that reflect your style.
 blogpay


Total Comments: 0