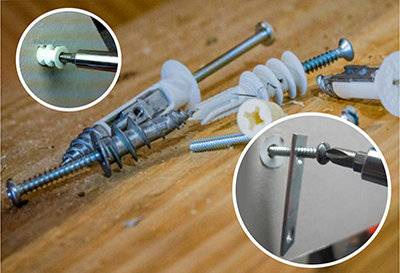
Do you want to mount something on your wall using through bolts and you find out that your walls have a dry wall lining? Then you may be facing a monumental task before you, since it is very tricky to install fixings in dry lining walls.
The reason why it is hard to put in screws and bolts on walls with a dry lining is because the plasterboard making up the lining is only affixed onto the brickwork or the block work with adhesive dabbing. One wrong move and you will end up ruining the plasterboard with cracks and compromising the wall's integrity.
So, you have your work cut out for you when you stick in screws on your dry lining walls. But it is definitely possible to get it done if you are willing to exert the effort to do so.
Understanding Your Dry Wall Before You Put In The Fixings
Dry walling is a very popular mode of building walls today. That is because there are many benefits that we can get from having dry wall linings in our interiors. Amongst these benefits are that drywalls are easier to build, easier to maintain, can muffle sounds, and can hide unsightly electrical wirings.
Structurally speaking, however, drywalls are quite delicate to work with post-construction. You cannot just poke into it using your power drill to install fixings because the dry wall lining essentially has a hollow space separating it from the brickwork of your wall where it is not glued on. Mounting stuff on the unsupported part of the wall will cause the wall to become deformed.
Putting Fixings in Dry Lining Walls
Given the complications involved in putting through bolts in walls with drywall linings, how do you go about it? The practical answer to this question is lined up as follows:
1. Mark out with a pencil where the holes for your screws will be drilled in. Make sure that these holes are located where the wall is not supported by any adhesive blobs.
2. Cut away at the plasterboard lining on the location where you will put in your screws, wall plugs and wall bolts. Be certain that you do not tear out any supporting adhesives on the wall as you cut away at it, and that space left out by the cut-out portion is neat and cleanly cut.
3. Create a batten or a spacer that fits that cut-out space perfectly. If this part is done well, you will create a seamless-looking space from the wall to the batten, as if you have not done any cutting at all.
4. Fit the batten into the empty, cut-out space. Afterwards, drill the hole where your fixings will be put into place. The hole should go right through the brickwork or block work of the wall and the screws should be long enough to fit right in. Remember to avoid the mortar joints so as not to compromise the integrity of your wall.
5. Mount whatever it is that you will be mounting on your wall lining using shorter fixings right onto the batten. Make sure that the through bolts are safe and secure.


